
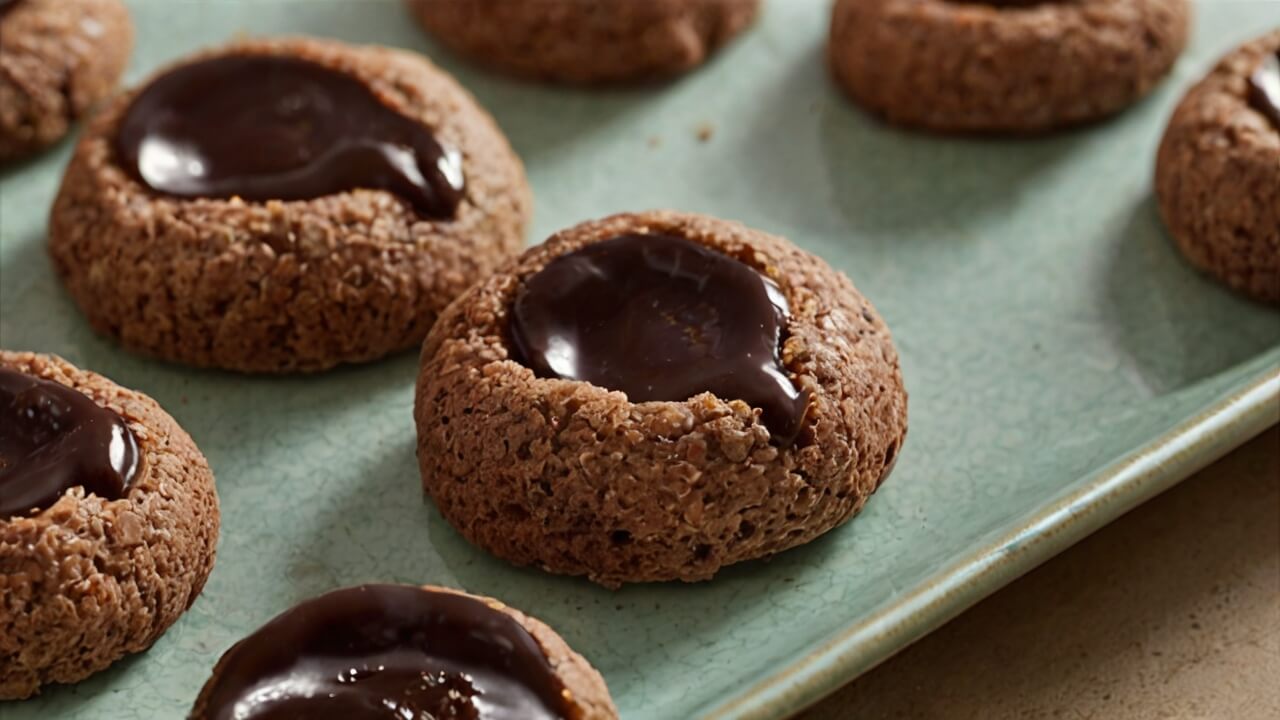
Looking for an easy dessert? Try this Chocolate Thumbprint Cookies Recipe! These cookies are soft, sweet, and filled with chocolate.
Perfect for parties, holidays, or everyday treats. Kids and adults love them equally. This Chocolate Thumbprint Cookies Recipe is simple to follow.
Even beginners can make these delicious cookies. You only need basic ingredients and about 30 minutes. The best part?
You can customize the chocolate filling. Use dark chocolate, milk chocolate, or white chocolate. Each bite melts in your mouth beautifully.
Let me show you how to make Chocolate Thumbprint Cookies that everyone will enjoy.
When I First Introduced to Chocolate Thumbprint Cookies
I discovered these cookies at my friend’s wedding. The dessert table had dozens of them. They looked so pretty with chocolate centers.
I took one bite and fell in love. The cookie was buttery and tender inside. The chocolate filling added perfect sweetness.
I asked for the recipe immediately. My friend’s mom shared it happily. Since then, I make these cookies monthly.
They’re now my go-to recipe for gatherings. Everyone always asks for the recipe!

Equipment List
You don’t need fancy tools for this. Here’s what you’ll need:
- Mixing bowls (two medium-sized ones)
- Electric mixer or whisk
- Measuring cups and spoons
- Baking sheets (two works best)
- Parchment paper or silicone mats
- Small spoon or your thumb
- Cooling rack
Ingredients You Need for Chocolate Thumbprint Cookies
- 1 cup softened butter
- ½ cup granulated sugar
- 2 egg yolks
- 1 teaspoon vanilla extract
- 2 cups all-purpose flour
- ¼ teaspoon salt
- ½ cup chocolate chips
- 2 tablespoons heavy cream
Step-by-Step Guide
- Preheat your oven to 350°F (175°C).
- Line baking sheets with parchment paper.
- This prevents cookies from sticking badly.
- Beat butter and sugar until fluffy.
- This takes about 3 minutes.
- Add egg yolks and vanilla extract.
- Mix everything until well combined.
- Add flour and salt gradually.
- Mix until dough forms properly.
- Roll dough into small balls.
- Each should be about 1 inch.
- Place balls on prepared baking sheets.
- Space them 2 inches apart.
- Press your thumb into each center.
- Make a deep indent for filling.
- Bake for 12-15 minutes exactly.
- Cookies should look lightly golden.
- Don’t overbake or they’ll be dry.
- Remove from oven and cool completely.
- Melt chocolate chips with heavy cream.
- Use microwave in 30-second intervals.
- Stir until smooth and glossy.
- Spoon chocolate into each thumbprint.
- Fill generously but don’t overflow.
- Let chocolate set for 30 minutes.
- Then they’re ready to enjoy!
Tips to Make the Best Chocolate Thumbprint Cookies
- Use room temperature butter for mixing.
- Cold butter won’t cream properly.
- Make thumbprints deep enough for filling.
- Shallow ones won’t hold much chocolate.
- Re-press indents after baking if needed.
- They sometimes puff up while baking.
- Try different chocolate flavors for variety.
- Nutella or caramel work wonderfully too.
- Store cookies in an airtight container.
- They stay fresh for one week.
FAQs about Chocolate Thumbprint Cookies
Q: Can I freeze the cookie dough?
A: Yes, freeze dough balls for 3 months. Thaw before baking for best results.
Q: Why did my cookies spread too much?
A: Your butter was probably too warm. Chill dough for 30 minutes first.
Q: Can I use margarine instead of butter?
A: Butter gives better flavor and texture. Margarine makes cookies less rich tasting.
Q: How do I prevent cracking around edges?
A: Press thumbprints gently, not too hard. Cracks happen with aggressive pressing techniques.
Q: What else can I use for filling?
A: Try jam, peanut butter, or frosting. Get creative with your favorite flavors!
Final Thoughts
This Chocolate Thumbprint Cookies Recipe is absolutely foolproof. They’re beautiful, delicious, and surprisingly easy.
Perfect for gifting during the holidays. Kids love helping make the thumbprints. It’s a fun family baking activity.
The ingredients for Chocolate Thumbprint Cookies are affordable. You probably have most at home already.
Once you learn how to make Chocolate Thumbprint Cookies, you’ll make them repeatedly.
They’re that good and addictive. So grab your ingredients and start baking. Your kitchen will smell amazing soon.
More Amazing Recipes
- Martha Stewart French Toast Recipe
- Martha Stewart Blueberry Muffins Recipe
- Martha Stewart Egg Strata Recipe
- Martha Stewart Blueberry Muffins Recipe

Chocolate Thumbprint Cookies Recipe
Equipment
- Mixing bowls (two medium-sized ones)
- Electric mixer or whisk
- Measuring cups and spoons
- Parchment paper or silicone mats
- Baking sheets (two works best)
- Small spoon or your thumb
- Cooling rack
Ingredients
- 1 cup softened butter
- ½ cup granulated sugar
- 2 egg yolks
- 1 teaspoon vanilla extract
- 2 cups all-purpose flour
- ¼ teaspoon salt
- ½ cup chocolate chips
- 2 tablespoons heavy cream
Instructions
- Preheat your oven to 350°F (175°C).
- Line baking sheets with parchment paper.
- This prevents cookies from sticking badly.
- Beat butter and sugar until fluffy.
- This takes about 3 minutes.
- Add egg yolks and vanilla extract.
- Mix everything until well combined.
- Add flour and salt gradually.
- Mix until dough forms properly.
- Roll dough into small balls.
- Each should be about 1 inch.
- Place balls on prepared baking sheets.
- Space them 2 inches apart.
- Press your thumb into each center.
- Make a deep indent for filling.
- Bake for 12-15 minutes exactly.
- Cookies should look lightly golden.
- Don’t overbake or they’ll be dry.
- Remove from oven and cool completely.
- Melt chocolate chips with heavy cream.
- Use microwave in 30-second intervals.
- Stir until smooth and glossy.
- Spoon chocolate into each thumbprint.
- Fill generously but don’t overflow.
- Let chocolate set for 30 minutes.
- Then they’re ready to enjoy!
Notes
- Use room temperature butter for mixing.
- Cold butter won’t cream properly.
- Make thumbprints deep enough for filling.
- Shallow ones won’t hold much chocolate.
- Re-press indents after baking if needed.
- They sometimes puff up while baking.
- Try different chocolate flavors for variety.
- Nutella or caramel work wonderfully too.
- Store cookies in an airtight container.
- They stay fresh for one week.
